Monday, 11 June 2012

Cooling System

Cooling System:

Although Cooling Systems have been getting better over the years, they are still not very efficient in terms of turning chemical energy into mechanical power. Roughly 70% of the energy in the gasoline is turned into heat, so it is the job of the cooling system to take care of that.
The main job of the cooling system is to keep the engine from overheating, to do this it transfers the heat to air.

Visual Inspection:
Before you test the cooling system you must first check the radiator to see if it is damaged or not and check for corrosion.


Checking the radiator cap:
First you check the condition of the cap, and I found the cap was in good condition.
To check the pressure that the cap should release at is located on top of the cap. (should be around 0.9 psi).


Check hoses for damage:
Visually and physically inspected the hoses for wear and tear.


Specific gravity of Coolant:
Use a hydrometer to measure the specific gravity of the coolant in the system.

Thursday, 17 May 2012

Oil Pump

The Oil Pump (in an internal combustion engine) circulates the engine oil through pressure into bearings, pistons and the Camshaft. It also assists in engine cooling.


Oil Filter:
The Oil Filter comes after the oil sump. So when the oil leaves the sump, it goes into the oil filter to get filtered before it gets fed to parts in the engine.


How it works:
The oil first comes in through the oil filter to make sure it's clean, after that it goes through to the sump (where the oil is stored). From there, it now goes into the oil pump. The oil pump then pushes oil into the pressure filter which then sends it the crankshaft, pistons etc.

File:Overhead cam engine with forced oil lubrication (Autocar Handbook, 13th ed, 1935).jpg

Tuesday, 15 May 2012

Cylinder Block Measurements

Theory Background:
I am going to measure the components of the Cylinder Block to make sure every thing is in order and there is no damage to parts such as the pistons and the crankshaft.
Piston - The piston is a metal object the sits in the piston chamber. It moves up to compress the air/fuel mixture on stroke 2 and push out the exhaust gas on stroke 4, and it moves down to let the air/fuel mixture in on stroke 1 and let the mixture ignite on stroke 3.
Crankshaft - The crankshaft rotates around to move the pistons up and down in time to complete the 4-stroke cycle.


Visual Inspection of Pistons:
Before you do any measurements on the cylinder head it is important to do a visual inspections of the components e.g pistons. To do this simply check the surface for scuffing or damaged.


Piston Diameter:
To measure the piston diameter, what you do is get a micrometer and measure the diameter form the skirt of the piston.


Cylinder Bore:
For measurements of the cylinder bore you need to measure both the Y and X axis on 3 different positions (top, middle and bottom). We do this to check the ovality of the cylinder bore. For example:
This is where and how to measure each point of the cylinder.


Piston Clearance:
To find the piston clearance, you get the measurements the largest cylinder bore diameter and of each piston diameter. Then, you subtract the piston diameter from the cylinder bore cylinder. For example; cylinder bore diameter 1 = 77.99mm and piston 1 diameter = 77.88mm, so the piston clearance = 00.11mm (77.99mm - 77.88mm = 00.11mm).


Piston Ring Clearance:
To check the piston ring clearance, all you do is find the specifications for piston ring clearance for that engine, then get a feeler gauge and put it in between the piston ring and the piston ring gap. If it stays under the maximum specification then it's good, if not then the piston ring needs to be changed.


Piston Ring End Gap:
For this measurement, what you need to do is put a piston ring into the cylinder and then check the gap between the ends of the piston ring whilst in the cylinder.


Crankshaft Main Journals:
To measure this, you get a micrometer and measure the diameter of each main journal on 2 points and on an A and B axis. This measures both the taper and ovality of the main journals.


Crankshaft Big End Journals:
For this measurement, you do the same as the previous measurements. But you measure the big end journals as opposed to the main journals.


Monday, 14 May 2012

Cylinder Head Measurements

Cylinder Head Warp-age:
To check the warp-age of the cylinder head you have to get a straight edge and a feeler gauge and check to see if there is any gaps between the cylinder head and the straight edge at any point.


Valve Stem:
To measure the valve stem, what you do is get a micrometer and check the diameter of the stem at 6 different points (at the top, middle and bottom). You need to do this in two directions to ensure the ovality of the valve stem.


Length of Springs:
For this test, you  measure the size of the spring from top to bottom to get the free length of the spring. They should all be within 1.5mm of each other.


Cam Lobes:
To measure the lift of the cam lobes, you need to first measure from the largest point of the lobe to horizontally across from that point. This will give you value A, next you measure across the circular point of the cam lobe. This will give you value B. To calculate lift, you subtract value B from value A. For example, A (38.07mm) - B (31.06mm) = C (7.01mm).
This needs to be done for both Inlet and Exhaust lobes.

These are my measurements for the Inlet lobes.
These are my measurements for the Exhaust lobes.

Sunday, 13 May 2012

Cylinder Block and Reassembely

The Cylinder Block is the base of the engine, and the cylinder head sits on top of it. It contains parts such as the Pistons, Flywheel and the Crankshaft.
The cylinder block holds the pistons and the crankshaft which work together with the valves in the cylinder head to power the engine.


Theory Background:
What I'm doing is reassembling the cylinder block completely.
How to reassemble the cylinder block:
1st:
The crankshaft needs to be placed back into the cylinder block.


After it has been put back in correctly, it needs to be fastened down with crankshaft bearing caps.


2nd:
The Flywheel needs to be bolted back on so the crankshaft can be turned over.


3rd:
You should make sure that the piston chambers are all clean and ready for the pistons to be put back in.


4th:
After you have made sure that the piston chambers are clean, it's time to put the pistons back into the chambers. To do this you must find which piston goes in which chamber. After that, the pistons are ready to go back in. To put them back in, a piston ring compressor should be used so that the piston rings don't pop out and break. 

This is what a Piston Ring Compressor looks like.

5th:
Next, you have to put the con rod caps back onto the con rod. 

This shows the Con Rod and the Con Rod cap.

This is how it should look while on the crankshaft.

6th:
After the caps are placed onto the con rod, they need to be torque to a specific specification. You can find this in the engines' manual.

Thursday, 10 May 2012

Valve Clearances

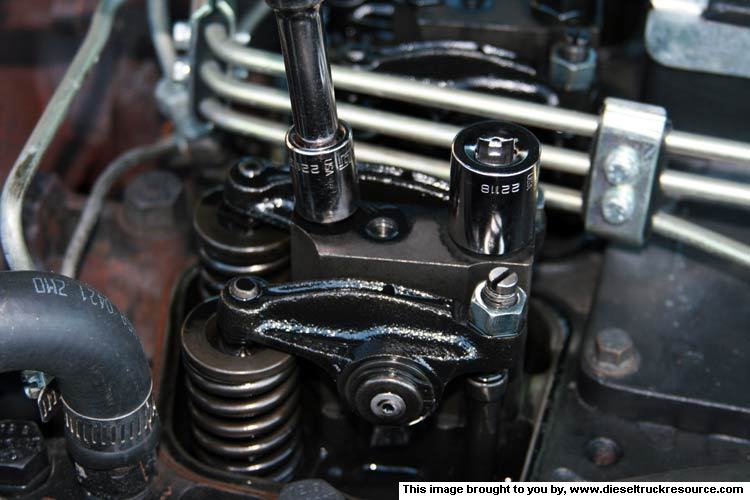
To check the valve clearances, you first have to know which cylinder valves to work on and when. For example, if you want to check the clearances on cylinder 1, you need to have cylinder 4 rocking and vice versa. To do this you need to loosen the nuts on the rocker arm and tighten/loosen the screws to get the correct clearance. The correct clearances are 0.15mm for the Inlet valves and 0.25mm for the Exhaust valves. 

Sunday, 6 May 2012

Cylinder Head and Reassembely

The Cylinder head covers the cylinder block. It contains parts such as the rocker arms, valve springs, valves and the Camshaft.
It works together with the cylinder block e.g. the pistons work in time with the valves in order to power the engine. 


Theory Background:
What I'm doing is reassembling the cylinder head completely.
How to reassemble the cylinder head:
1st:
You make sure that the cylinder head is clean and there is nothing clogging any passage ways or gaps.
2nd:
After that, you have to put all the valve springs back into the head. 


To do this you need to use a spring compressor to push the springs down on the valve in order to put the valve keepers in.
 
This is a diagram of how the valves should be assembled.
3rd:
After the valves have been put back in, you then put the Camshaft back into the cylinder head.
 
4th:
Once the Camshaft is back in the cylinder head, the rocker arms need to go back on.
 
The rocker arms work together with the Camshaft, e.g. when the cam lobes push on one end of the rocker arm, the other end opens the valve.


The cylinder head should look like this when completed: